
I’m not endorsed by any of these companies, but I wanted to share some sewing tools I personally enjoy using! They’re not necessarily essential, but they do save time and certainly reduce my stress. The best part is that the majority of these tools are under $10!
Needle Puller
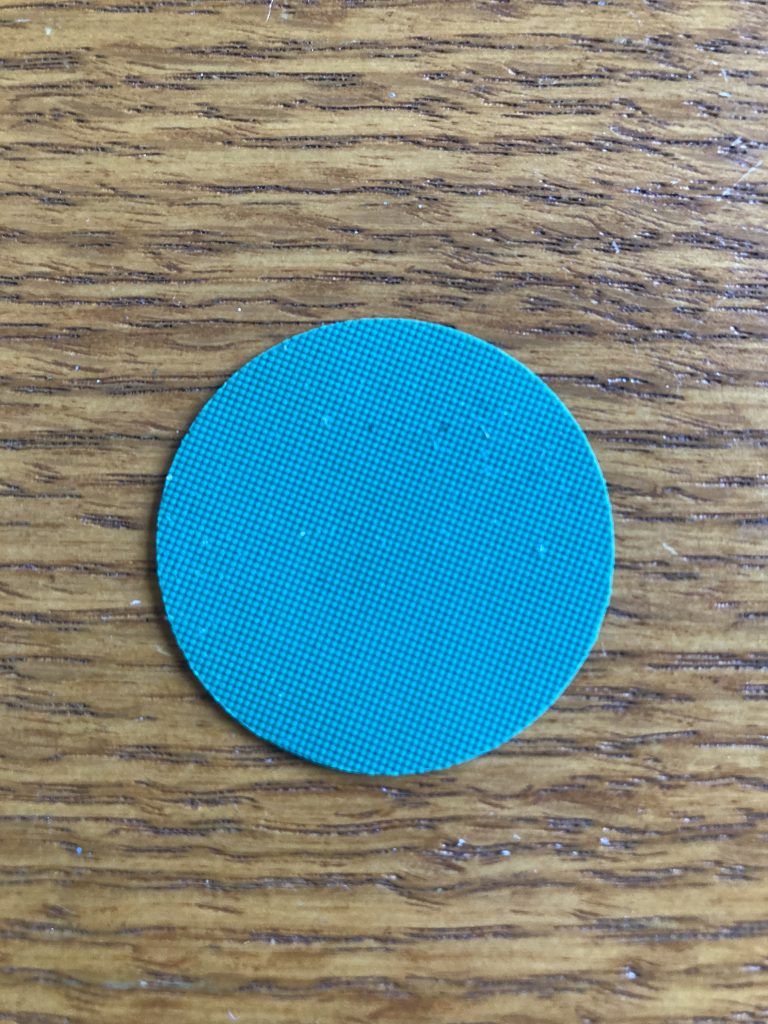
If you value your fingers at all, I HIGHLY recommend getting yourself some needle pullers! These work especially well for embroidery, but they’re great for hand sewing too (particularly anything involving thick fabric). Even with calluses I still struggle to pull a needle through tougher fabric at times and then I end up with inflamed fingers. Using a needle puller became a total game changer for me.
There are two main styles that I know of, one looks kind of like a thimble and is worn on your finger. The other, the kind I use, is a little circle of a silicone-like material that lets you grip the needle. I picked this style because I like that it leaves your fingers free, and it’s bendable. Also I got a 3 pack of them for super cheap! I found mine at my local fabric store.
Scrap Bucket
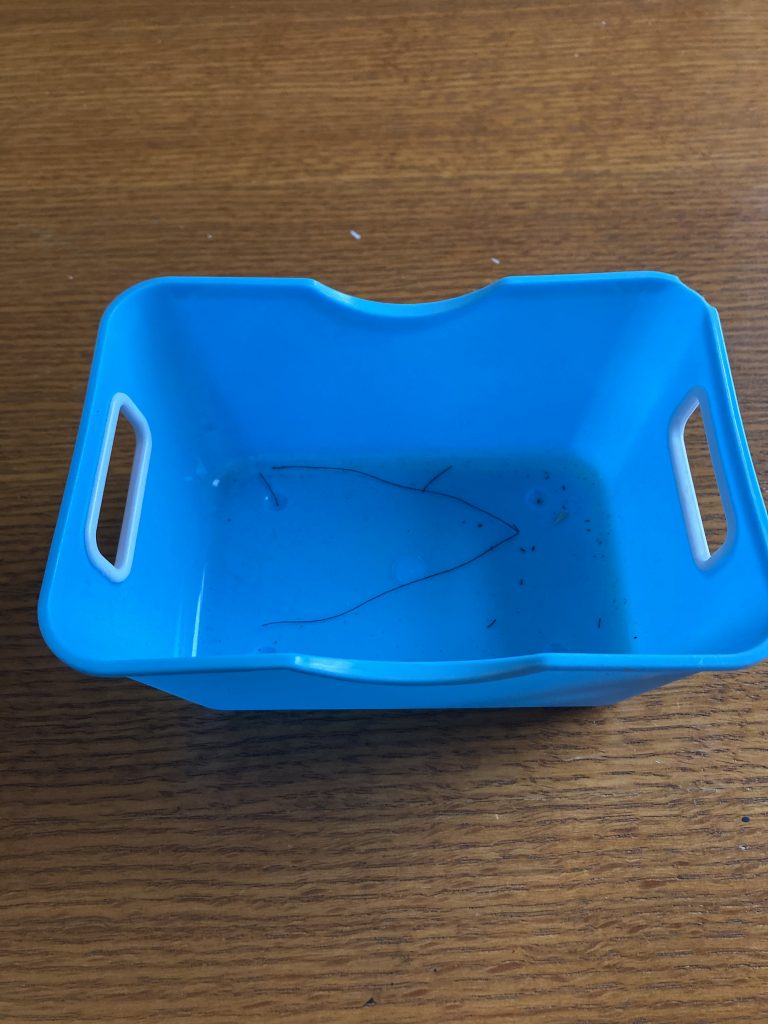
Sometimes I sew or embroider in my living room, and it can be a pain in the butt to move the giant smelly garbage can. But I also don’t want to get threads all over the place. You know those cute little stationary buckets and containers they have at the dollar section of Target? Get yourself one of those to hold your scraps. It’s cheap, it’s cute, it’s perfect. Mine is probably about 6 inches long and 3 inches wide, and it’s maybe 3 inches tall? So it’s pretty small. I bring it with me to the couch and I can easily dump it out into our actual garbage once I’m done for the night. This is easily one of my most used sewing tools.
Needle Minder
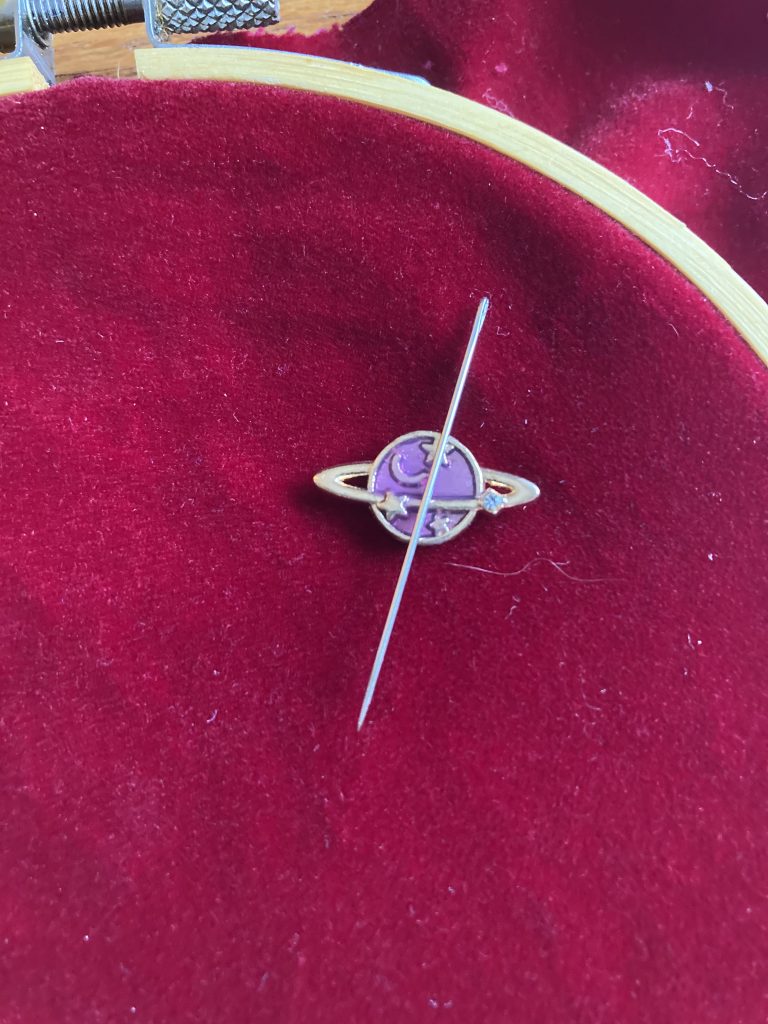
I recently discovered an amazing little tool that’s especially helpful for hand sewing and embroidery! Have you ever set your needle down for just a second to get more thread, and then all of the sudden it’s gone? It’s horrifying, and also dangerous! A needle minder is basically two magnets that go on your sewing/embroidery project and your needle will stick to it! One magnet goes on the backside, the other on the front. You’ll keep track of your needle, and it won’t harm the fabric. I’m guilty of “pinning” my needle into my fabric, which is bad because it can leave holes.
Needle minders are pretty easy to make if you want to go that route. A lot of people glue something on one of the magnets to make it more fun. For example, I bought one from Etsy that has a cute little enamel planet! It’s a simple little tool that’ll prevent the inevitable stress that comes with searching for a lost needle.
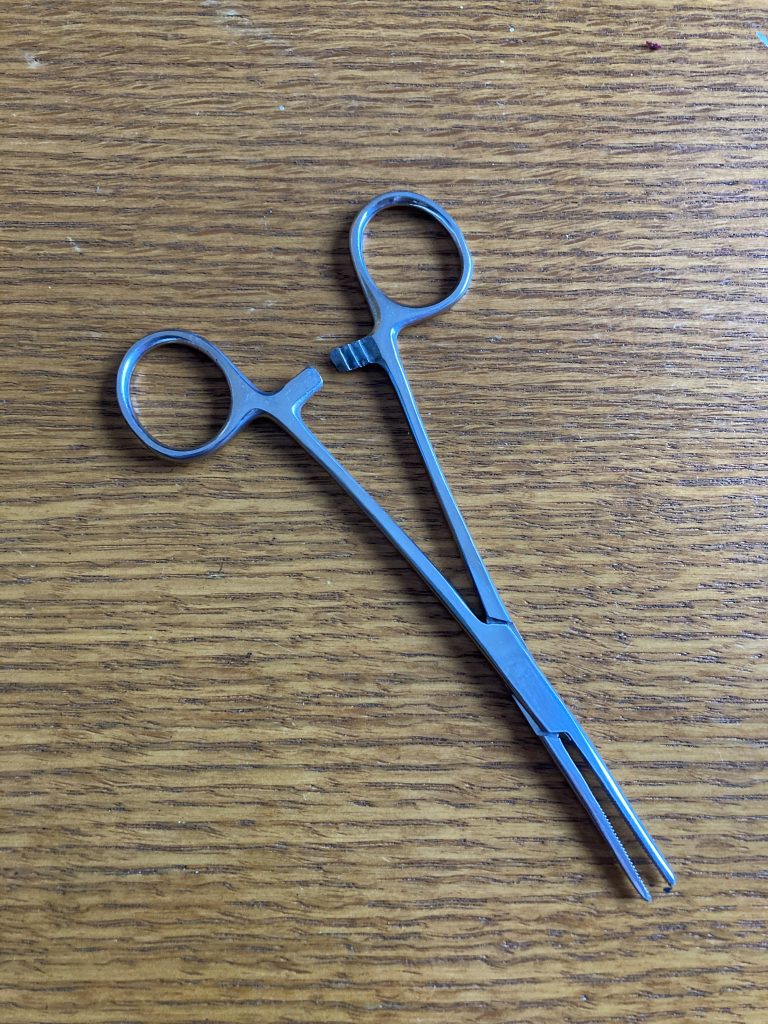
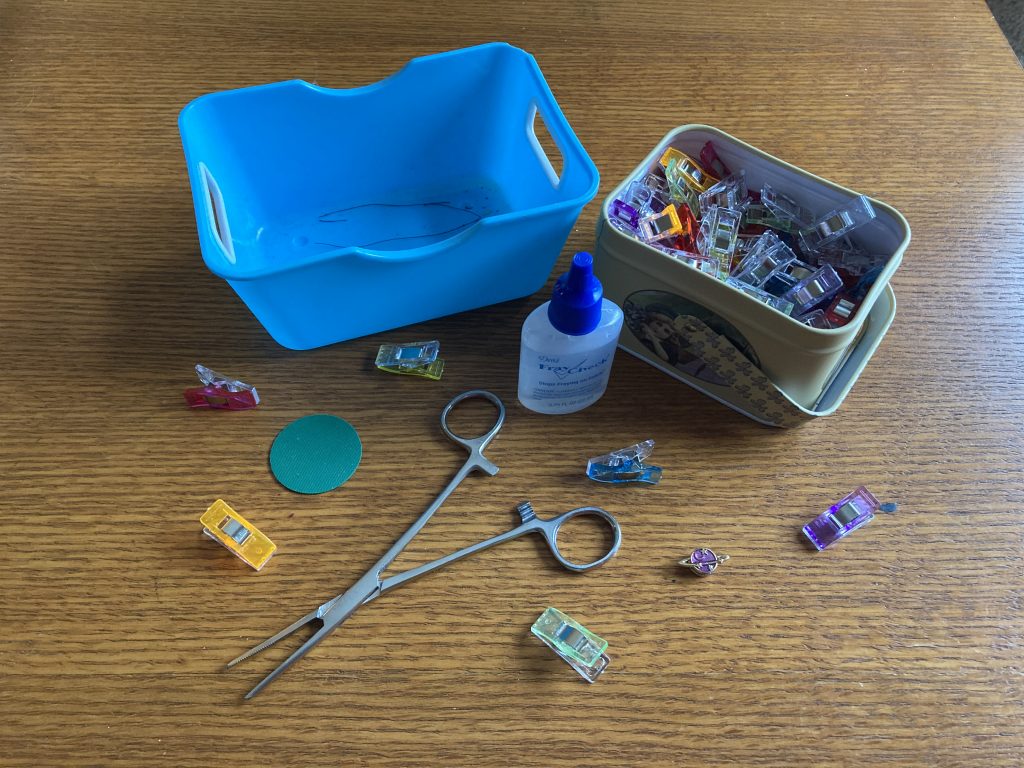
Hemostats
Turning something inside out really sucks sometimes. I like to use hemostats to help with corners. It’s also handy for stuffing a project with batting. There’s probably other similar tools, like tweezers, that can work for these dilemmas, but I particularly like hemostats; they’re long but still skinny, they can be locked into place, and they’re usually pretty cheap. I think I got my pair online for $4.
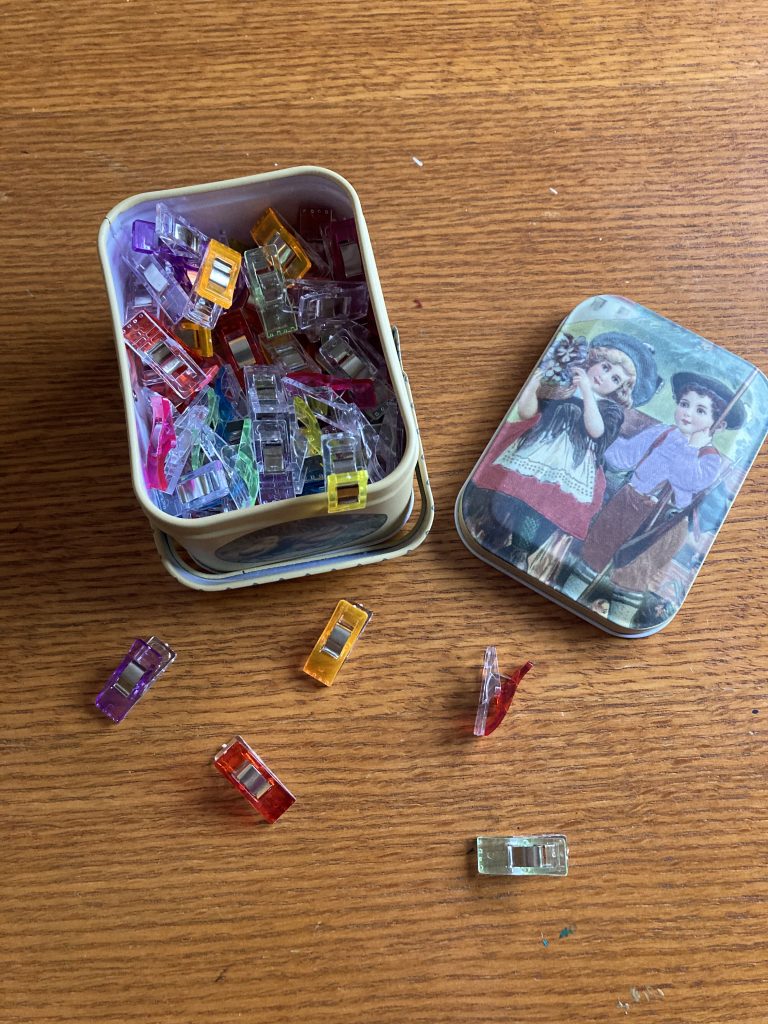
Wonder Clips
Most people who sew have probably heard of wonder clips at some point. I recently bought some off Amazon; it was around $10 for 100 small clips and it came in a little tin case (that’s admittedly kinda creepy but oh well). Buying them online in bulk is definitely a lot cheaper than the options I saw at my local fabric store.
I was a little skeptical at first, but once I used them a few times I realized why people love them so much. First of all, there’s nothing sharp about them. It’s much safer than pins. They’re colorful and easy to spot if you love one. I suppose it could break if you aren’t careful, but they don’t get bent out of shape. And best of all, it saves so much time on the majority of my projects.
HOWEVER! I did discover that they can’t completely replace pins, at least for me. Anytime you want something pinned in place and it’s not close to an edge, you might have to revert to pinning. So for example, I added pockets to an apron recently and the placement was so far from the edge there was no way I could use the clips. Which is fine by me, I appreciate that the clips are as versatile as they are already.
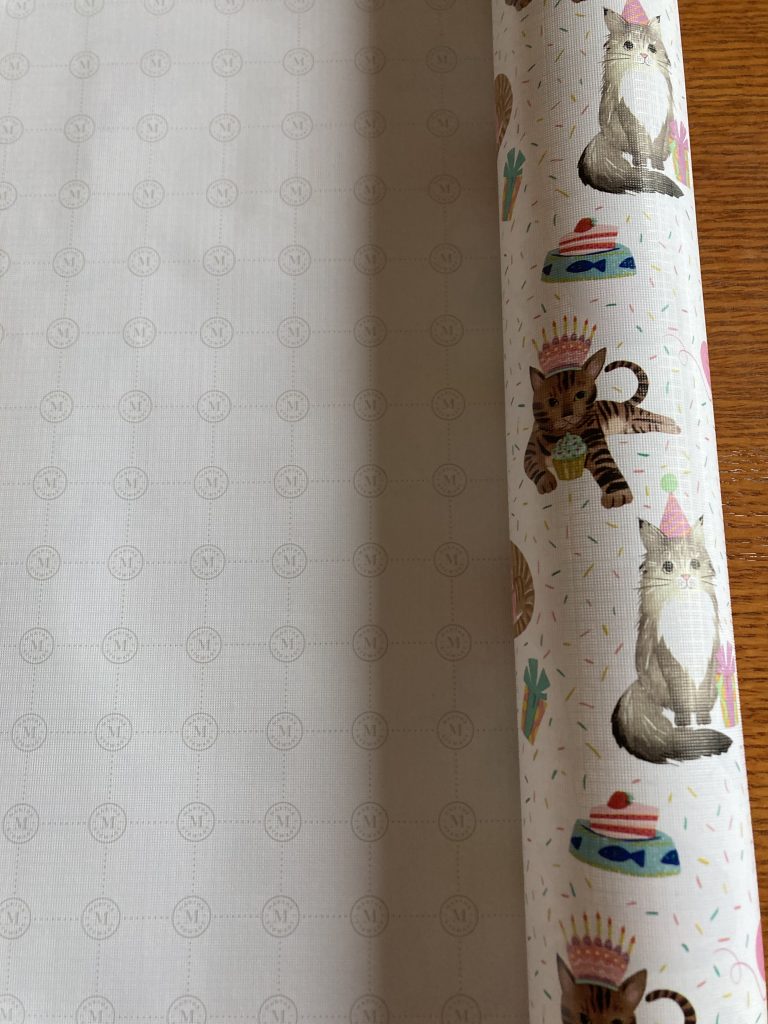
Wrapping Paper
Given how expensive patterns can be, I sometimes do some self-drafting. Tissue paper is pretty flimsy and wrinkles like crazy. I instead like to use wrapping paper for my patterns! It’s pretty durable, it’s a great size, and a lot of them come with grids on the back already which is super helpful for measuring. I don’t use anything fancy, usually just whatever I can find at the dollar store. Since it’s a little thicker than tissue paper, it’s also much easier to write on it and fold it if needed.
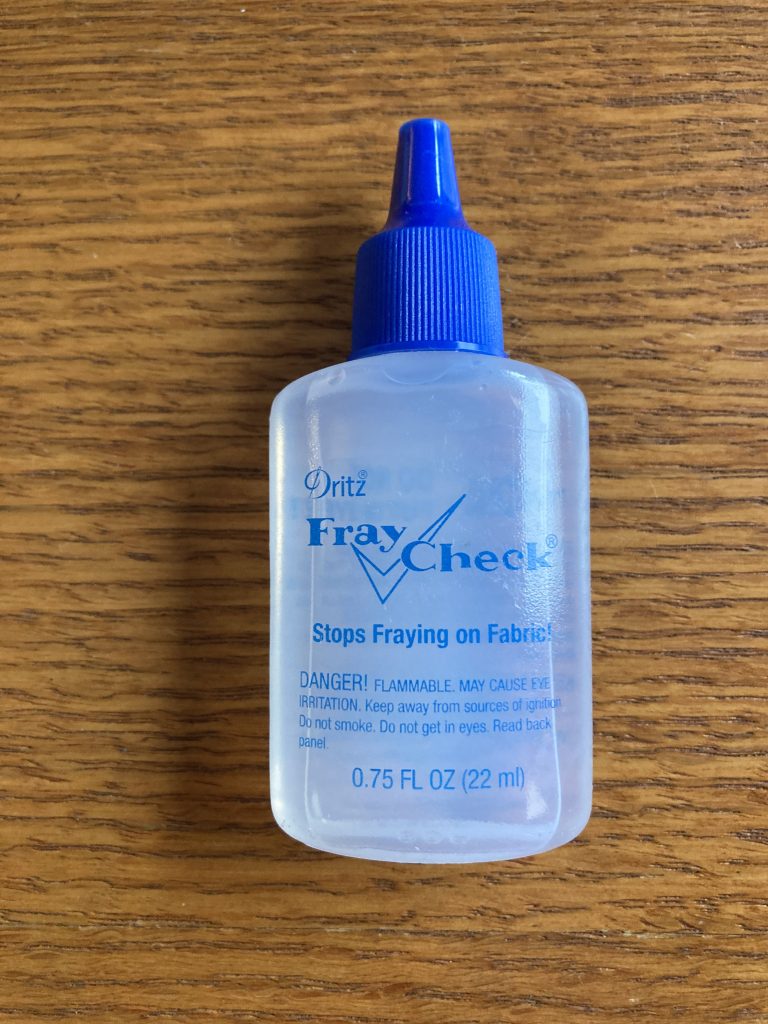
Fray Check
I don’t need this super often, but fray check is a good thing to have on hand for the times you do need it. Some fabric just doesn’t stop fraying (looking at you, lamé) and a little bit of this on the edges works wonders. It can make fabric kinda crusty, so I usually don’t use it on clothes if I can help it. It is, however, made to survive in the wash!
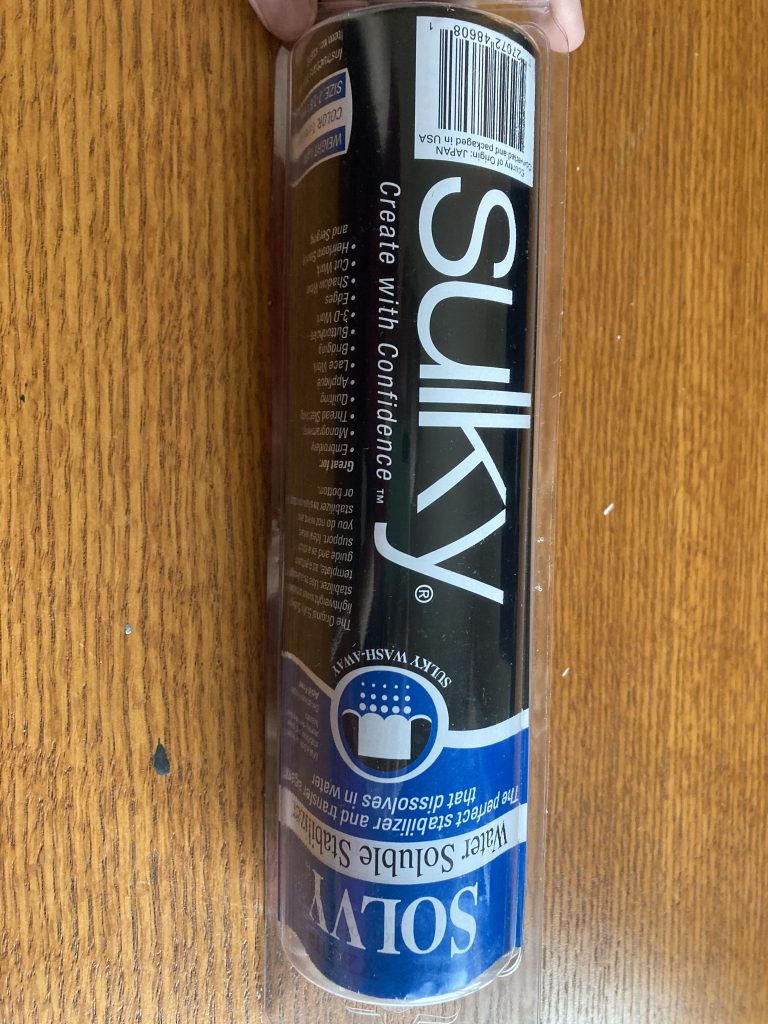
Water Soluble Stabilizer
Stabilizer is a great tool for embroidery projects! If drawing directly on the fabric with some kind of marker or chalk isn’t your thing, water soluble stabilizer is your new best friend. Other kinds of stabilizers are great too, but water soluble works particularly well for almost all of my projects. I don’t use it every time, but it’s nice for more intense designs or anything with a lot of words.
I usually draw out a more elaborate design on paper first and then, since it’s clear, trace my design onto the stabilizer with a pen (I’ve used a few different pens and all have worked great for me, but definitely test it out first!). Try to be a little gentle since the pen can warp or rip the stabilizer. I then pin my design where I want it on my fabric and embroider over the top of it like normal. Note that the stabilizer can be a little slippery while embroidering, so just be careful with your pinning.
And then finally! The most magical part! You can use a wet cloth and dab/wipe the stabilizer away. Or, depending on the project, you can put the fabric directly under running water and rub it off with your fingers; the stabilizer will dissolve in seconds along with the pen. I’ve never had a pen bleed onto the fabric or anything like that, but it’s worth trying out before you use it on an actual project. It’s pretty cool to see it disappear if I’m being honest. It shouldn’t leave any residue or anything, and once it’s dry it’ll look like you never used stabilizer at all!
I hope I was able to suggest new, helpful sewing tools for you! Thanks and happy sewing!!